Rubber Base 101 — Professional Nail Education | PNTA
Rubber Base 101
Everything you need to know about rubber bases — what they are, how they work, and how to choose the right one for every client.
What is a rubber base?
A rubber base is a flexible, adhesive base layer applied directly to the nail plate before colour or builder product. The term "rubber" refers to the nature of the cured product — it's soft, cushioning, and flexible rather than hard and rigid. It moves with the nail instead of fighting against it.
That flexibility is what sets rubber bases apart from standard base coats, and it's the reason they've become such an important part of professional nail systems.
The nail plate is made up of overlapping layers of keratin — think of them like roof tiles sitting on top of each other. When a nail is untouched, those scales sit flat and smooth, which makes it harder for product to grip. When we dehydrate the nail and remove the shine, those scales open slightly, creating more surface area for the product to bond to.
The rubber base flows into those micro-irregularities and cures in place — this is a mechanical bond. For clients with oily or dense nail plates, the scales resist penetration, which is why thorough prep and targeted adhesion products make such a measurable difference. The flexibility of the cured rubber base then maintains that bond through the normal flex and stress of daily wear.
What does a rubber base do?
A rubber base isn't just a step you move through to get to the colour. It's doing several important jobs at once.
Heat spike buffer
Gel products generate heat during curing. The rubber base layer sits between the nail plate and the product above it, absorbing and dispersing that heat before it reaches the client.
Retention for problem lifters
Because it moves with the nail, a rubber base maintains its bond under the stress of daily activity — particularly valuable for clients who experience lifting with standard bases.
Bridging layer for flexible nails
A rigid product applied over a flexible nail will eventually lift. The rubber base absorbs that flex, acting as a bridge so movement transfers into the rubber layer rather than breaking the bond.
Soak-off base under file-off systems
Applied under hard gels, a rubber base allows you to file back to the rubber layer and soak off the remainder — protecting the nail plate from aggressive filing all the way down.
Colour change without full removal
De-bulk back to the clear rubber base layer and follow an infill protocol — saving time, reducing unnecessary removal, and minimising stress on the nail plate.
The three Planet Nails rubber bases
PN stocks more than one rubber base deliberately. Different clients respond differently to formulations at a biological level — the goal is always to match the product to the client's needs, not to find one universal solution.
Lastik BIAB
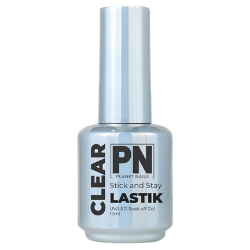
- Flexible hybrid — works as both rubber base and builder
- HEMA provides strong adhesion — often the key to resolving lifting for many clients
- Starting point for the majority of new clients
- Can be applied thicker to add structure and extension
Lastik HF BIAB

- Same flexible hybrid format as Lastik
- HEMA-free, using a phosphate adhesion monomer for bonding
- For confirmed HEMA allergy or persistent lifting with Lastik
- Can also be applied as a builder
Stick 'n Float
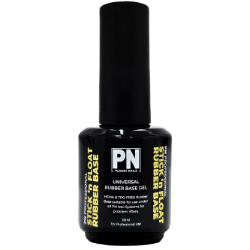
- Rubber base only — cannot be used as a builder
- HEMA-free and TPO-free
- Self-leveling, medium viscosity
- Excellent for oily, sweaty, flaky, or brittle nail plates
- Up to 3 weeks wear under gel polish
Matching the right base to each client
The right base for one client is not always the right base for another. Here's how to think through that decision.
| Client situation | Recommended starting point |
|---|---|
| Most new clients | Sticky Bond primer + Lastik |
| Confirmed HEMA allergy | HEMA-free primer + Lastik HF or Stick 'n Float |
| Lifting persists despite correct prep | Escalate to Lastik HF or Stick 'n Float |
| Oily, sweaty, or difficult nail plate | Stick 'n Float — consider scrub coat protocol |
| Client needs builder capacity | Lastik or Lastik HF (Stick 'n Float cannot build) |
The prep sequence
Preparation is where retention is won or lost. This sequence applies regardless of which rubber base you're using — HEMA-free systems in particular require especially intentional prep because the adhesion chemistry works differently.
-
1Both tech and client wash hands with soap and water — removes physical debris and pathogens before you begin
-
2Sanitise both tech and client hands at the nail table
-
3Gently push back the skin folds
-
4For clients with excess moisture — oily or sweaty nail plates — additional dehydration at this stage using The One, acetone, or talc/baby powder as needed
-
5Remove true cuticle using cuticle prep bits — dead, non-living tissue only. Never cut living skin.
-
6Remove shine from the nail plate using a fine sanding band or nail buffer — you are looking for a light, even surface. Not rough. Not over-worked.
-
7Sanitise using The One, which also performs a dehydration step. After this step you are looking for a shine-free, dead skin-free, chalky appearance. If the nail looks rough or over-worked, you've gone too far.
-
8Step 1 — Prep: Apply nail prep to the nail plate
-
9Step 2 — Prime/Bond: Apply Sticky Bond or primer based on your client's needs. Allow to air dry.
-
10Step 3 — Base: Apply your chosen rubber base. Cure for 60 seconds under the PN Speciality Dual Cure lamp, 60 seconds under a 405nm lamp, or 2 minutes under a 365nm lamp.
-
11Proceed with your system
Applying your rubber base
Fresh application
- Complete the full prep sequence
- Apply a smooth, even coat of rubber base across the entire nail
- Ensure clean product margins and check all perimeters — sidewalls, cuticle area, free edge
- Layer thick enough to cushion but not so thick the nail looks bulky
- Cure for 60 seconds under the PN Speciality Dual Cure lamp, 60 seconds under a 405nm lamp, or 2 minutes under a 365nm lamp
- Proceed with your colour or builder system
Infill and rebalance
- De-bulk the existing product
- Complete prep and prime
- Apply a continuous coat — focus thickness in the regrowth area
- Draw a thinner layer over existing product for a flush transition
- Ensure clean product margins before curing
- Cure for 60 seconds under the PN Speciality Dual Cure lamp, 60 seconds under a 405nm lamp, or 2 minutes under a 365nm lamp
- Proceed with your system
Removal
Standard soak-off removal
Applies to Lastik, Lastik HF, and Stick 'n Float
- Buff or file the surface to break the seal
- Soak in acetone for 10–15 minutes
- Gently remove softened product with an orangewood stick
- Do not force — re-soak if needed
Under file-off systems
When used under hard gels (PUG, Iconic)
- File back to the rubber base layer — not through it
- Soak off the rubber layer with acetone
- This protects the nail plate from aggressive filing all the way to the natural nail
Prep thoroughly. Choose intentionally. Apply correctly.
A rubber base is one of the most functional products in your kit. Understanding what it does, why the chemistry matters, and how to match it to each client is what separates a service that consistently performs from one that doesn't.
frequently asked questions
The questions we hear most often about rubber bases, answered clearly.
Do I actually need a rubber base, or is a regular base coat enough? +
For most professional nail systems — gel polish over enhancements, BIAB, polygel, hard gel — a rubber base offers significant functional advantages over a standard base coat. It buffers heat during curing, creates a more resilient bond, accommodates natural nail flex, and supports easier removal under file-off systems.
A standard base coat is a simpler adhesion layer. A rubber base is doing multiple jobs at once. For clients who experience lifting, have flexible or thin nail plates, or need long-wear results, a rubber base isn't optional — it's the foundation the rest of the service is built on.
Which Planet Nails rubber base should I start with for a new client? +
For most new clients, start with Sticky Bond primer and Lastik. The HEMA in both products supports strong adhesion for the majority of clients — and for many, it's precisely what makes the difference between a service that lasts and one that doesn't.
If your client has a confirmed, medically diagnosed HEMA allergy, move to a HEMA-free primer and either Lastik HF or Stick 'n Float from the outset. If lifting persists with Lastik despite thorough prep, that's your signal to explore Lastik HF or Stick 'n Float.
The range exists because client biology varies — the goal is always to match the product to the client.
My client has had reactions before — should I automatically switch to HEMA-free? +
Not necessarily. A reaction to a nail product doesn't automatically mean a HEMA allergy — a confirmed allergy requires proper medical diagnosis and testing. HEMA-free products still contain other acrylate monomers, which can also cause reactions if product repeatedly contacts the skin or is improperly cured.
If a client has a confirmed, diagnosed HEMA allergy, then yes — move to HEMA-free options from the outset. But switching as a precaution for all clients isn't the answer, and for some clients, HEMA is actually what gives them the retention they need.
My client keeps getting lifting — what should I do? +
Start with prep. The majority of lifting issues come back to preparation — incomplete dehydration, residual shine on the nail plate, product at the skin folds, or missed areas at the sidewalls and free edge. Work through the full prep sequence methodically before assuming the product is the issue.
If your prep is thorough and lifting is still occurring, introduce the scrub coat protocol — working a small amount of rubber base into the nail plate with firm circular motion before applying the full layer. This maximises mechanical adhesion for clients whose nail plates are resistant to bonding.
If lifting continues despite correct prep and the scrub coat, explore switching the base. Lastik HF or Stick 'n Float may respond better to that client's nail plate chemistry. Different clients respond differently to formulations — and that's exactly why PN offers more than one option.
Do I need to use the scrub coat protocol on every client? +
No — the scrub coat is a targeted protocol, not a default step for every client. Most first appointments won't require it. It's most useful when a client returns with lifting, or when a client communicates at their first visit that they have a history of retention problems.
When you do use it, the two steps work together — the scrub saturates the keratin scales for maximum adhesion, and the layer that follows creates the cushioning effect. Both steps are necessary, and the scrub coat can be used with any of the three PN rubber bases.
How long do I cure the rubber base, and does my lamp matter? +
Yes — lamp type affects cure time. For all three PN rubber bases:
- PN Speciality Dual Cure lamp: 60 seconds
- 405nm lamp: 60 seconds
- 365nm lamp: 2 minutes
Under-cured product is one of the most common causes of both lifting and skin sensitisation. Always cure for the recommended time for your lamp type — do not reduce cure times.
Can I use a Planet Nails rubber base with products from another brand? +
PN rubber bases are formulated and tested as part of the Planet Nails system. Mixing bases and builders from different brands introduces variables that haven't been tested for compatibility — which can lead to poor adhesion, unexpected interactions, and lifting that's difficult to diagnose.
For consistent, predictable results and the best outcome for your clients, we always recommend working within a complete, tested system. If you're troubleshooting retention issues, ruling out cross-brand compatibility as a factor is an important step.
FAQ
-
 100% Secure Content
 -
 Competitive Pricing!
 -
 Order Tracking Available
 -
 3 - 6 days for delivery